I recently laser-engraved my laptop at revspace, using their FabKit MK5. As the laptop is made out of anodised aluminium, “engraving” amounts to burning off the anodisation layer, leaving bare (oxidised) aluminium. The resulting white colour complements the grey anodisation quite nicely in my opinion.
The design is (a variation of) an islamic geometric pattern called the tenfold rosette. I have drafted this on paper with compass and straightedge many a time, and now I drafted it digitally, in librecad. I imported the resulting .dxf file into inkscape, where I tweaked the desired angle and scale. Once I was content, I converted the draft lines into outlines, added a rectangle representing the entire laptop, added (or removed?) a “keepout” zone around the logo, and exported to .svg. (tip to any framework owners who want to do something similar: an .svg of the logo can easily be found on the framework website).
With the final design decided upon, the lasering could commence. First, I taped a piece of scrap mdf onto the lasercutter’s bed, to serve as a sample and as a fixture. I engraved the design into said piece of mdf, to see it in real life and at real scale. I also cut out the rectangular outline of the laptop, so I could use that to align the laptop. After this outline had been cut, I made sure to not home the laptop anymore, so it would not lose its bearing relative to the cut it had just made.
Now that the laptop wasin place, I did a few checks to raise the likelihood of success: I verified that the laptop’s top was (sufficiently) parallel to the bed, I “framed” the design, I checked that the logo on the laptop aligned with the logo on my mdf sample, etc. As a final check (of sorts), I engraved an outline of the design onto the laptop (at a modest 60mm/s and 20% power), to once more verify alignment. During the entirety of this job, my hand was hovering over the “pause” button, in case anything went wrong. Luckily, it went all right, the only minor hickup was that my keepout zone was not exactly centered around the laptop’s (plastic) logo. As there was still a sufficient distance however, I decided to keep going nonetheless.
After the outline job, I started a line-scanning fill-in job, at 90mm/s, 20% power, and a line distance of 0.1mm (aka 254 lines per inch). For some unknown reason, however, the laser head was not moving at anywhere close to 90mm/s. This decreased speed meant that the job would take an estimated 2:30 hours. I was briefly worried that that would cause overheating, as the lasercutter was dwelling on the same spot for more time than intended. However, after pausing the job, it turned out that the laptop was not even hot to the touch, so I could safely resume the job. I suspect that the great thermal conductivity of aluminium as well as the high reflectivity of aluminium oxide must have helped prevent overheating.
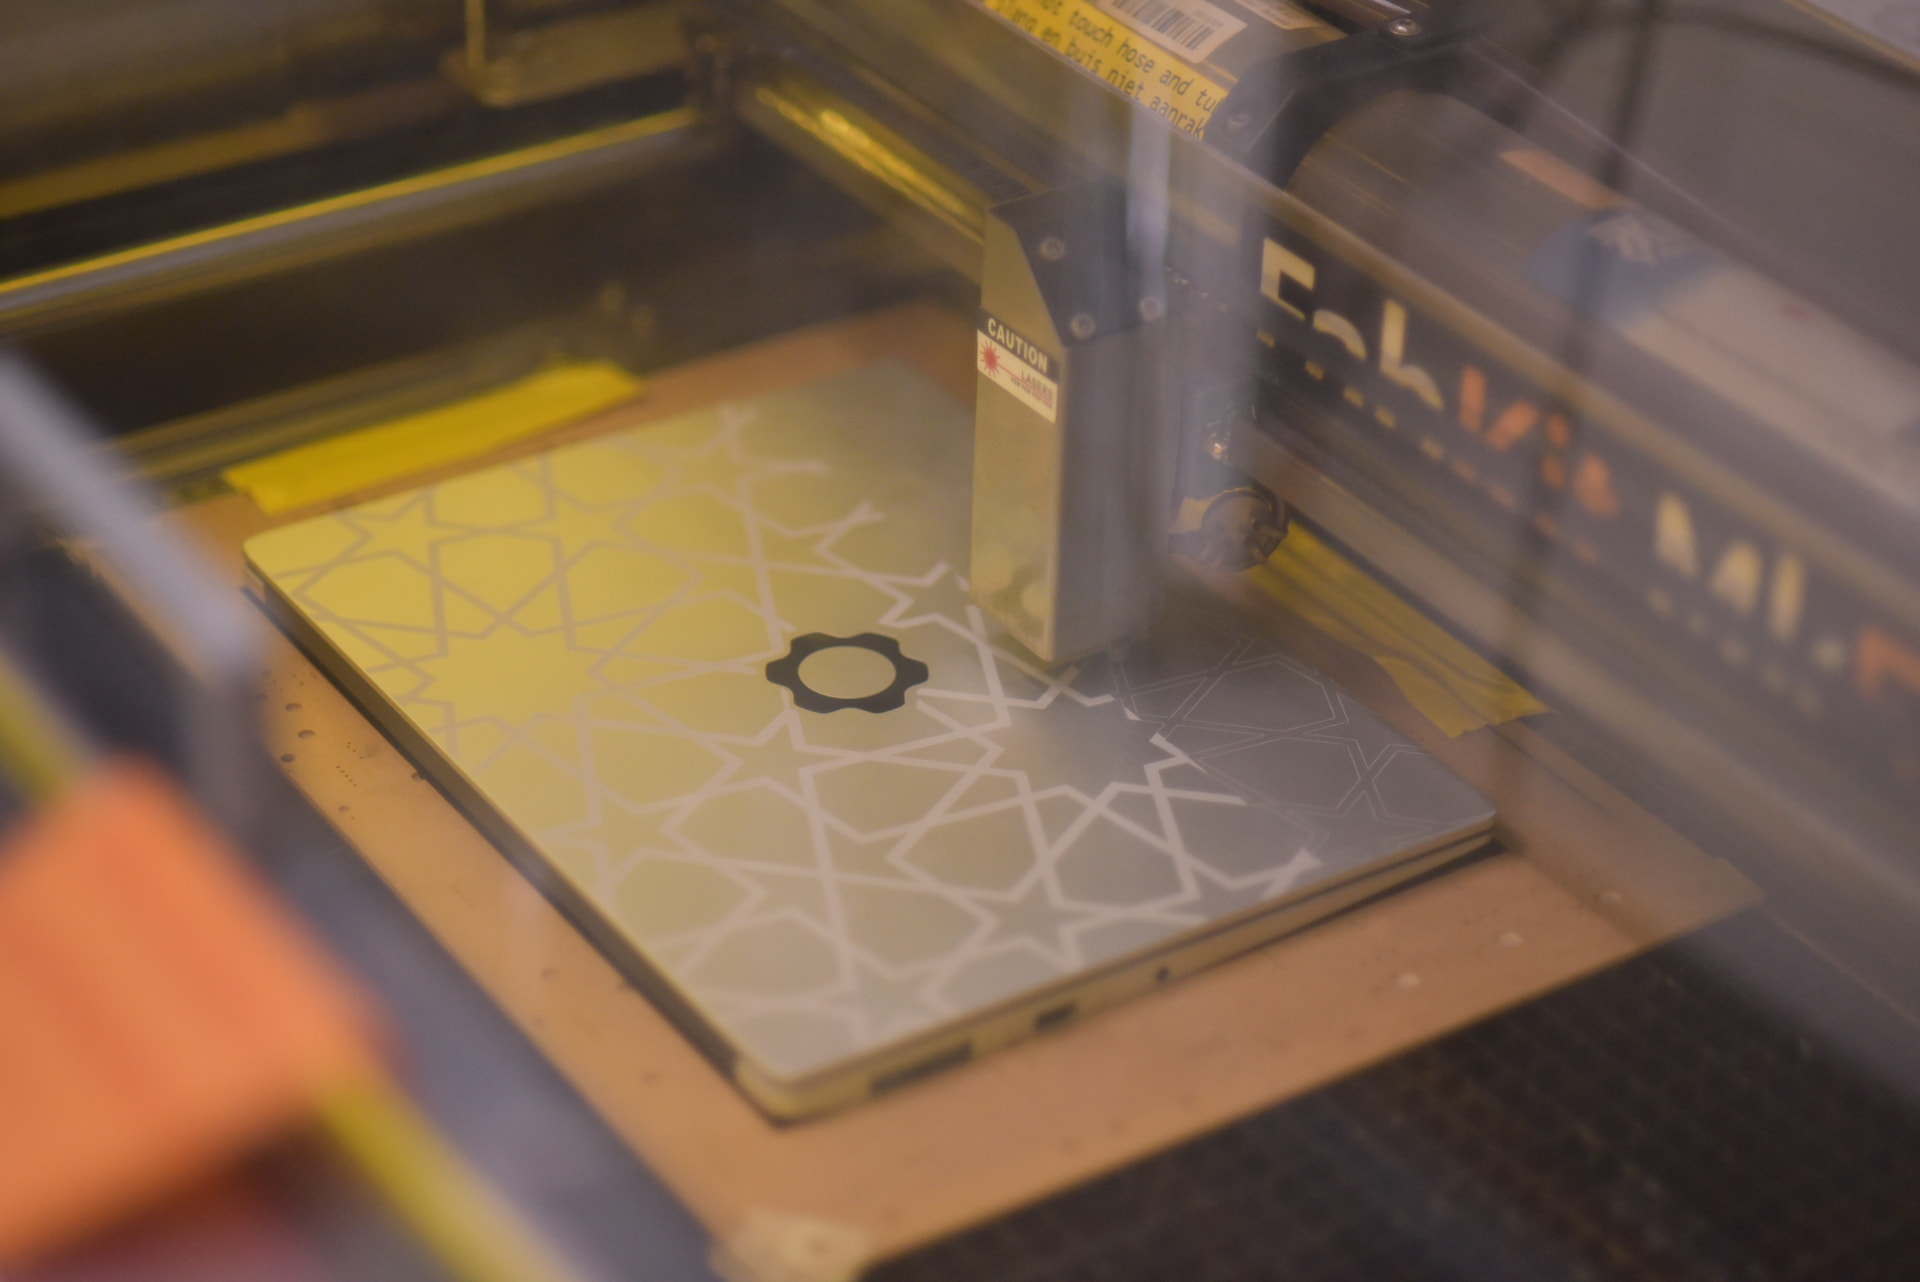
(a work-in-progress picture of the laptop in the lasercutter, roughly 80% done)
After much waiting, staring, and more waiting, I heard the horrible sound of a stepper motor screeching to a halt: the laser head had run into my laptop at roughly 90% of the job. This may have been caused by a flipped bit in the gcode or by a glitch in the electronics/software/my behaviour. I quickly paused the lasercutter, but the laser head had already skipped many steps and had thus lost track of its position. Since, by this time, the morning was already nearing, I decided to call it quits for the night. At some later point (to be determined) I intend to engrave the last little bit, since I think I won’t mind a slight mis-alignment between the two parts of the pattern
This was a really fun, scary, and rewarding project. Ever since I got this laptop four years ago, I had wanted to do something like this, and all that time I had held off on putting any stickers on it for that reason. I am very happy with the result, and my hands are itching for more laser-engraving. The bare palm rests of my laptop are suddenly very tempting, as is the (sadly curved) underside thereof.
If I were to do (something like) this again, I would probably disassemble the laptop, to make alignment easier and to lessen the stakes. I would also spend more time on a fixture to make alignment repeatable, I might even use the screw holes of any aluminium laptop parts for alignment. Furthermore, I think a smaller-scale geometric pattern might have had a nicer effect (resulting in more of a texture than a design), but I like this bolder, larger look a lot too. Finally, I’m interested in seeing what results could be achieved by playing with the scan line direction and/or dithering